A good map is the essence of orienteering. All of the maps used at a CROC orienteering event are custom made from some of our expert mappers. They typically use some expensive software, techy-tools such as laser imaging data to create accurate contour lines, and high-resolution satellite imagery.
While all that work is needed to make a map suitable for competition, it's fortunately much easier if you want to make a quick and easy map for a youth group, school, church activity, or the scout orienteering merit badge.
Here's a step-by-step guide along with some screen grabs to show how it’s done.
General plan:
Choose your location, launch CalTopo, zoom in, choose a base map
Make a PDF map, choosing a “zoomed in” custom scale for maximum detail, and print your map
Take the map to the field, note any updates or changes, and hang some surveyors tape at the control points
Photocopy the map with controls marked on it and go orienteering
Choose your location, launch CalTopo, zoom in, choose a base map
First, find your area of interest. You probably have something in mind already. It can be the campus of a school, a local park, or a larger state park.
Open up a browser on your desktop computer and go to caltopo.com. This is a wonderful mapping tool, and best of all most of the functionality is free.
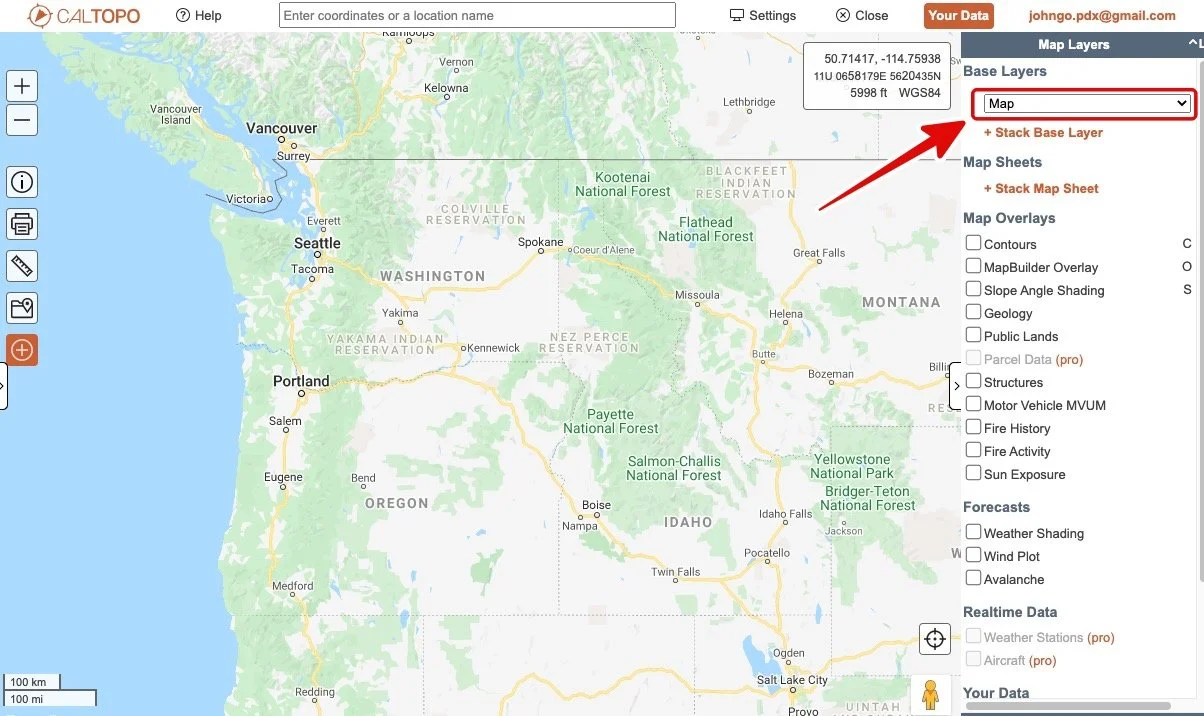
Below is a map of the Pacific Northwest in Caltopo. In the top right corner under Base Layers, you'll see a drop-down menu. Click this and you can select from different map types. Suggestion: Use Google maps initially to zoom into your area. That’s a map that draws quickly and you're probably already familiar with.
In the image below, we see the Pacific Northwest in Google maps.
Zoom in to where you want to make your map. For this example, we’re using a small park area near Vancouver Washington called Whipple Creek.
We can see the outline of the regional park, but it’s big green blob, not very helpful for orienteering. Let's choose another map layer that shows the trails.
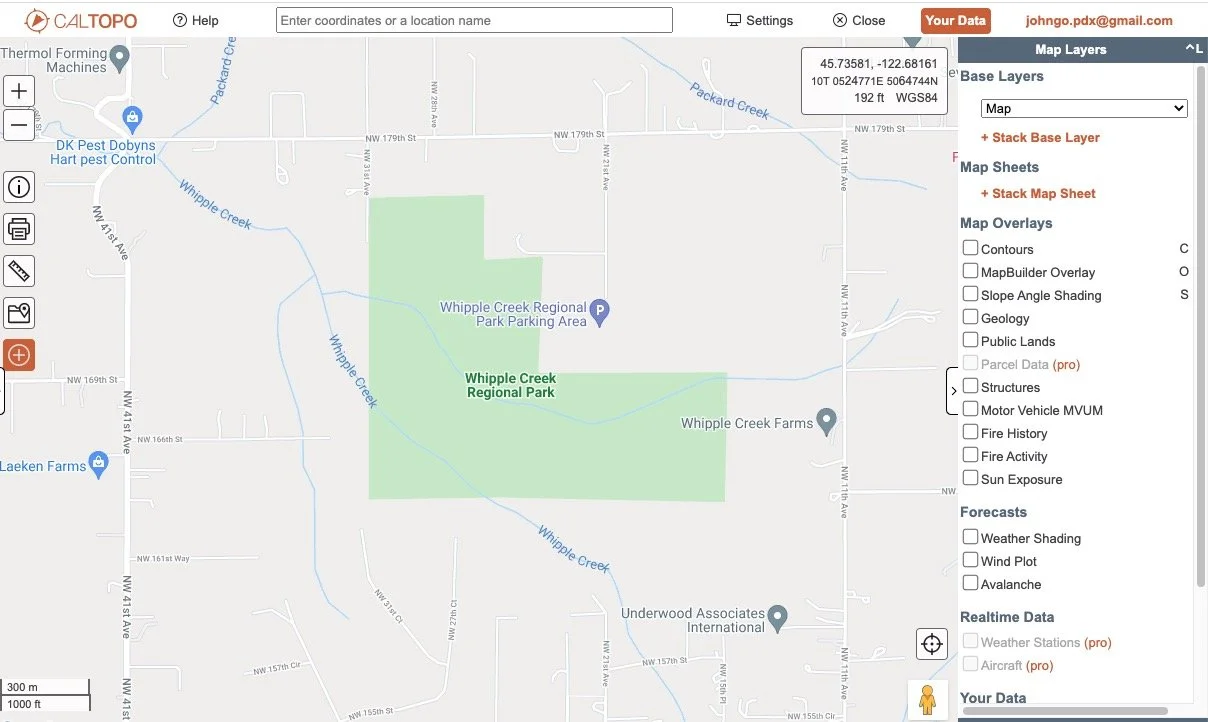
From the drop-down base layer menu in the top right corner, choose MapBuilder Topo. This shows trails quite clearly. Other map layers that might be useful for your area are called Open Cycle and Open Street map. These two can be better for urban areas, like streets and a school campus. Try different map layers and see which one looks good to you.
Below is Whipple Creek area, in MapBuilder Topo. Much better!
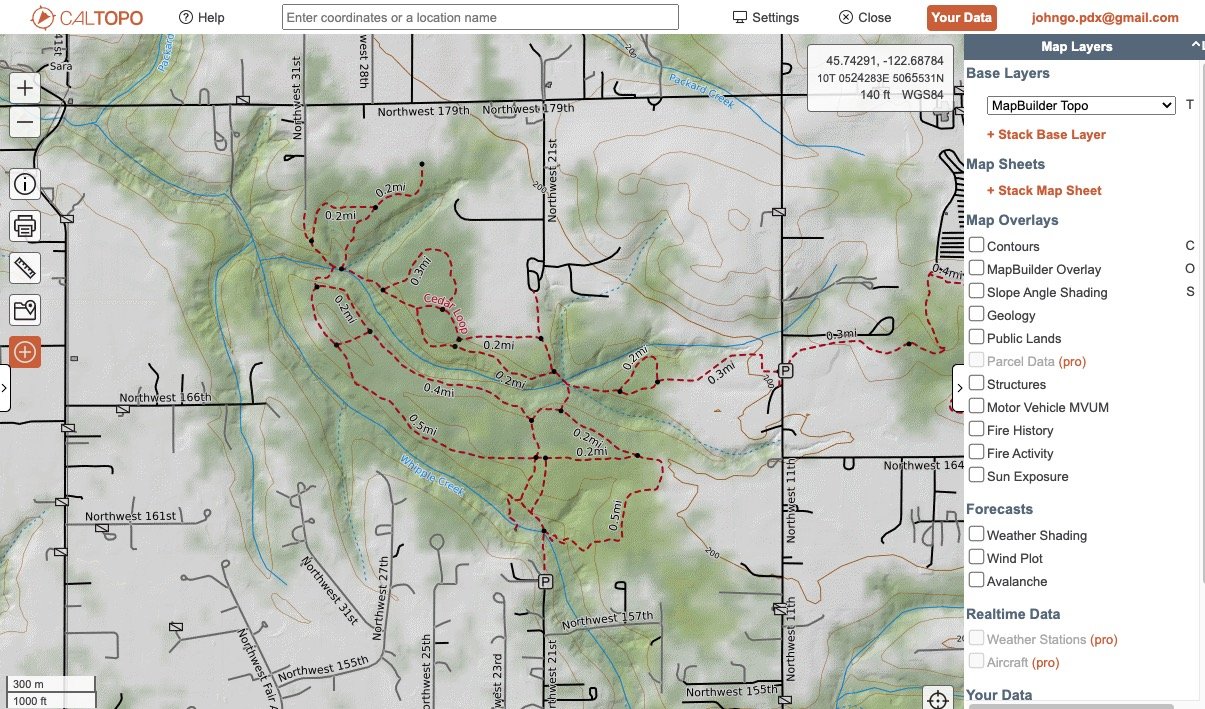
Make a PDF map, choosing a “zoomed in” custom scale for maximum detail, and print your map
The next step is choosing what scale to print the map. Generally, we want to be as “zoomed in” as possible to show the maximum amount of detail on the map.
The scale used to determine this is called a ratio scale. For example, 1:10,000. That means that one unit of anything (an inch, a centimeter, the length of a pencil) is equal to 10,000 of those same units in the real world. The smaller the second number, the more “zoomed in” the map.
Standard orienteering maps usually have a scale of a big round number, such as 1:10,000, but there’s no reason why you have to do that.
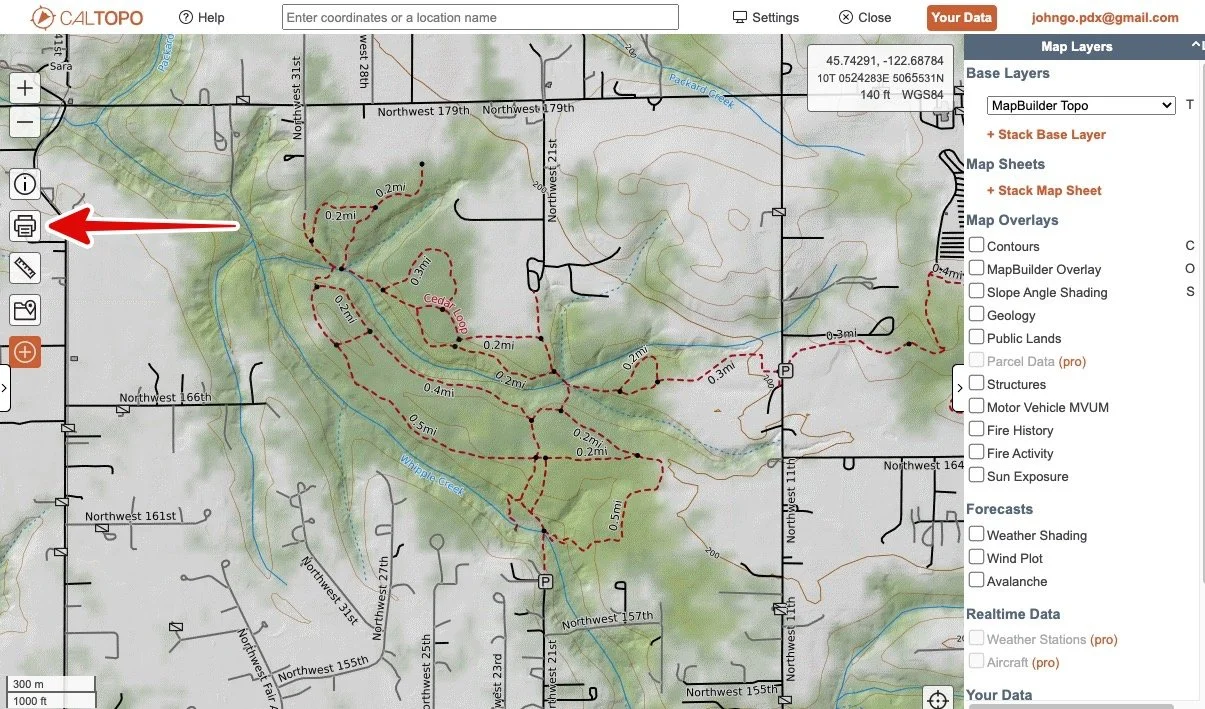
Below: Click the “Print” icon on the left side of the window to bring up the print function in a new browser tab.
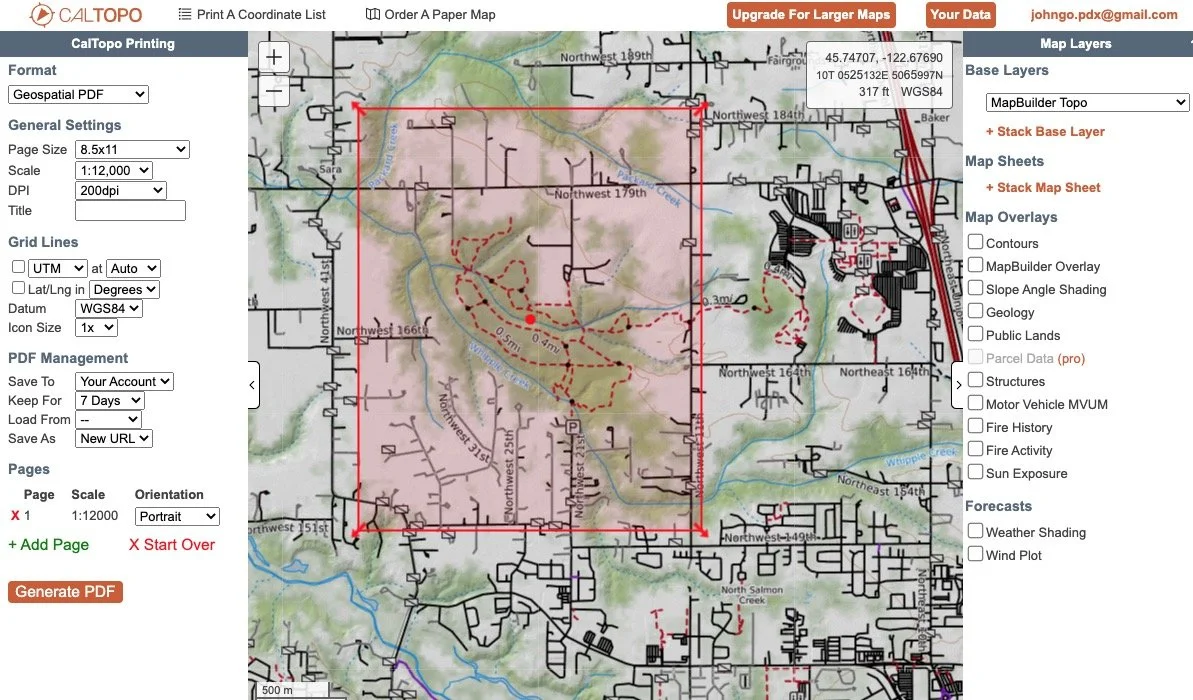
Here’s a screen grab of the Whipple Creek area at a scale of 1 to 12,000. You can see the map scale on the left side drop-down menu.
The red shaded box shows the print area. Click and drag the arrows on the corner of the red box to change the print area.
As you can see, the area of the park is quite small compared to the paper size. That tells us that we can use a more zoomed in map, which will show more detail.
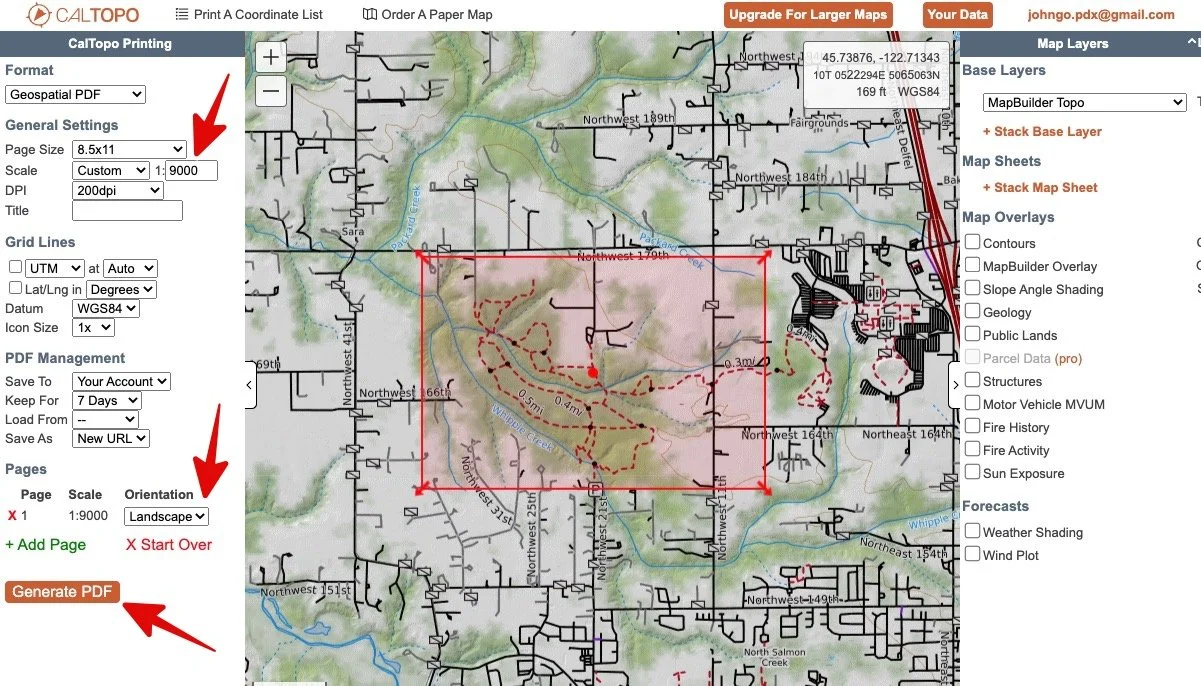
Click the drop-down menu next to Scale. There are some preset scales that are commonly used, but at the bottom you can see a space for custom. Here's where you can enter your own number to dial in the zoom level of the map.
Let’s try 1:9000. Enter “9000” in the custom scale box, and then click just outside it to reset the print area. As we can see in the screen grab below, 1:9000 captures the whole area of the park quite nicely.
We want to print our map on standard 8 1/2 x 11 paper, you can see that in the “Page Size” option just above scale, no need to change that.
Notice at the park kind of runs east-west, but the default print box is north-south. No problem, you can fix that. Click the “Orientation” box shown by the arrow at the bottom, and change from Portrait to Landscape. The print box should redraw oriented as a rectangle left to right.
When it all looks good, click “Generate PDF” at the bottom. Wait a minute or so, and the PDF map should open in a new browser tab.
Right click it and save it with a good descriptive name to your hard drive. Give yourself a high five, you just made a map!
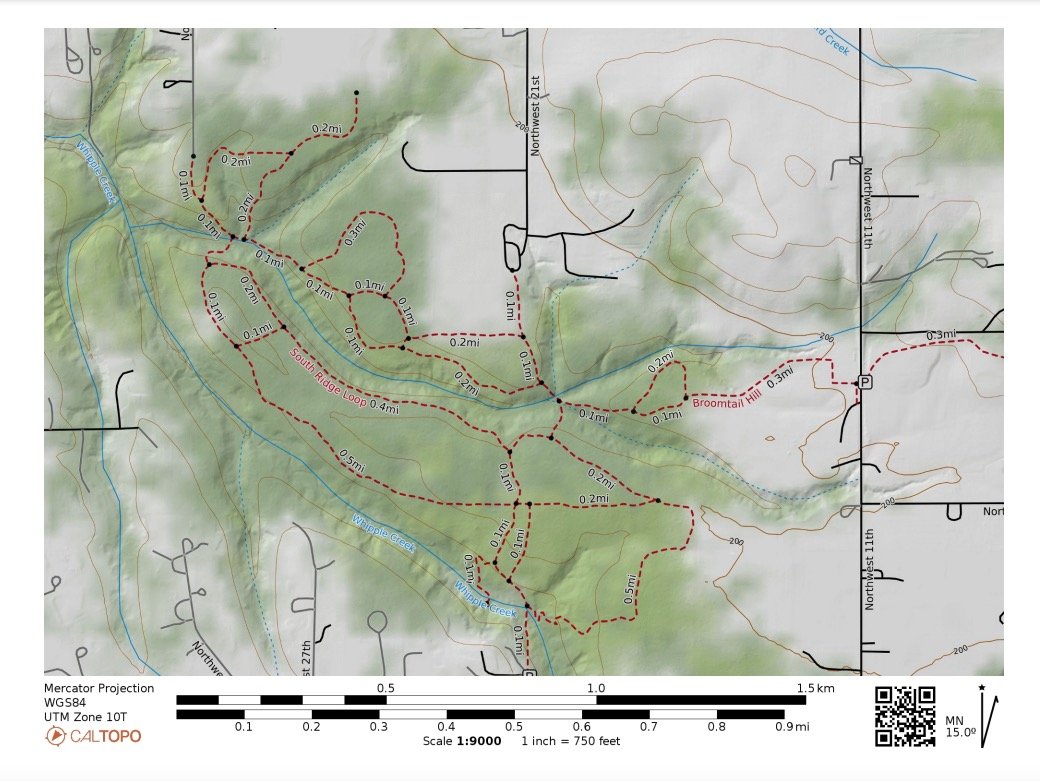
Let's check out our Whipple Creek map. We have a scale bar in miles and kilometers, the ratio scale of 1:9000, and a diagram in the bottom right corner telling you that the magnetic declination is 15° east.
Take the map to the field, note any updates or changes. Mark control points on your map and and hang some surveyors tape
Print out a few copies of your map. You'll get the best quality if you use a color laser printer instead of an inkjet.
Now it’s time for a little fieldwork. Use a clipboard if you have it, and do this on a day when it’s not raining. :-)
Go out to your area, and try to walk every trail on the map to be sure that your map matches what’s actually on the ground. If it doesn’t, you can add trails with a pen or pencil, or maybe cross out a trail that doesn’t exist anymore.
While you’re on your field check, also make a note of what would be good control points. (If you’re in any sort of a nature preserve, the park managers probably may not want you walking off trail too much, so please keep that in mind.)
Also be mindful of the experience and age of the people who will be doing the course. If they’ve never done orienteering before, it’s probably best to have all of your control points in easy-to-find places like trail intersections or a bends in the trail.
Now, you need to mark the control points so people can find them. An easy way to do this is to use plastic fluorescent flagging tape that you can get at most any hardware store. Use a sharpie pen to mark a number on the bottom of the tape, and tie it off on a tree or a bush.
A traditional orienteering course requires you to find the control points in a specific order. So, you can simply number the flagging tape 1, 2, 3, etc. and mark the corresponding numbers on your map.
That’s about it. Now you have a reasonably accurate map, with marked, numbered checkpoints, and with flagging tape marking all the points out in the field.
It can be a good idea to have someone who's never done the course before check everything out to be sure it's marked correctly, before you have other people try it.
Photocopy the map with controls marked on it and go orienteering
You're ready to go! Print enough for copies of the map for everyone who wants to try the course, and go have some fun!
Be sure and remove the flagging tape when you're done with your event.